

How To Repair 2012 Chev Silverado, Low Beam Light That Is Out.
Chevrolet Silverado Headlight Bulbs Replacement Guide
How to modify burnt out low beam, high axle or plow bespeak bulbs in the headlights of a 2007-2013 GM Chevy Silverado.
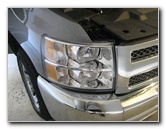
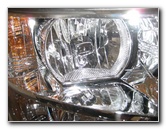
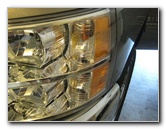
2013 Silverado Headlight
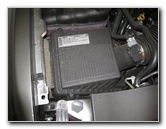
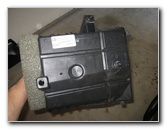
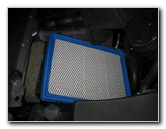
Engine Air Box
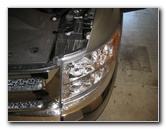
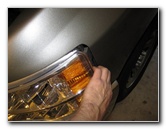
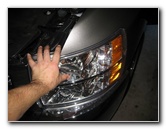
Commuter Side Headlight
Owners of other General Motors vehicles such as the GMC Sierra, Terrain, Acadia, Yukon, Savana, Chevy Colorado, Avalanche, Express, Equinox, Traverse, Tahoe, Suburban, Spark, Sonic, Cruze, Volt, Malibu, Impala, SS, Camaro, Corvette, Verano, Regal, LaCrosse, Encore, and Enclave may also detect these DIY instructions to be helpful.
Replacement headlight bulbs with their part numbers are as follows: Low Beam # H11, High Beam # 9005 or HB3 and Turn Point / Parking Light # 3157A (also 3157NA or 4157NA).
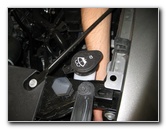
No tools are needed to replace the driver side depression or loftier beam bulbs. To replace the driver side turn signals, yous'll demand a 7mm socket and 10mm socket with a one/four" bulldoze ratchet.
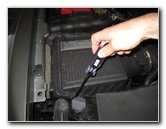
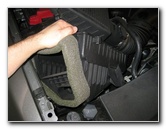
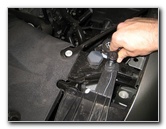
To replace the passenger side headlight bulbs, you'll demand a Torx T-25 star flake screwdriver to remove the engine air box.
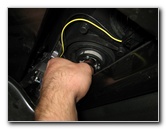
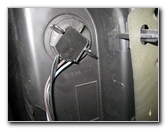
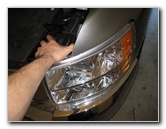
Driver Side - Reach In
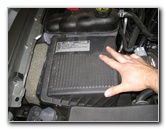
Passenger Side - Air Box
4 Torx T25 Screws
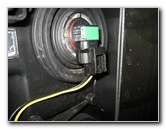
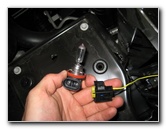
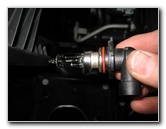
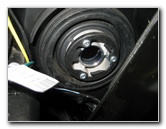
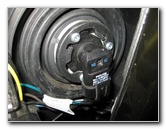
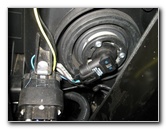
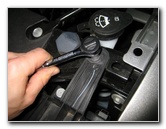
The low beam seedling is located at the superlative of the headlight and the loftier beam bulb is located merely below it. Remove them past first rotating the base of the bulbs 1/4 turn counter clockwise and so pull them direct out. Press the release tab on the power connector, slide information technology straight off, and push on a new # H11 low beam or # 9005 (HB3) high axle bulb.
Try to avoid touching the glass function of the new halogen bulbs. If you practice bear upon the glass part of the new bulb with your fingers or anything greasy in the engine bay, wipe it make clean with an alcohol moistened paper towel.
Insert the new bulb in to the housing and rotate it 1/4 turn clockwise to secure it in place.
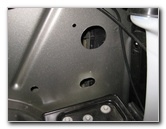
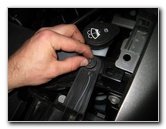
If you need to remove any of the headlight or turn signal bulbs on the Passenger Side, y'all'll get-go need to remove the engine air box.
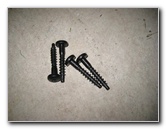
Use a Torx T-25 star chip screwdriver to remove the four screws that hold the top half of the engine air box in place. Prepare them aside in a safe place.
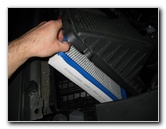
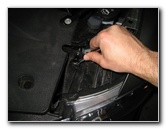
Pull Out Engine Air Filter
Pull Upward Lower One-half
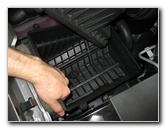
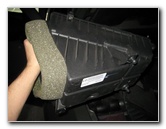
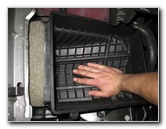
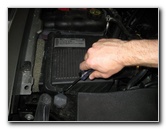
Removing Air Box
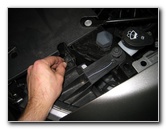
Carefully pull upward on the lower one-half of the air box until it pops out of the engine bay. It is held in place by a few plastic pegs that act as friction fasteners.
Pegs On Lesser of Box
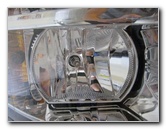
Low Beam & Loftier Beam
Depression Beam Seedling At Peak
Depression Axle Headlight
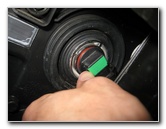
ane/4 Plough Counter Clockwise
Depression Beam Removed
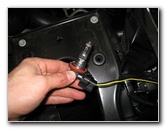
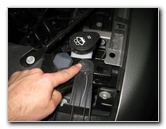
Press Release Push button
Slide Off Ability Plug
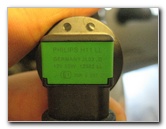
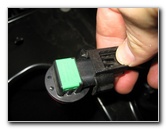
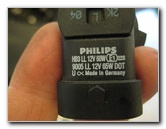
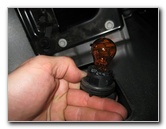
Philips H11 LL 12V 55W
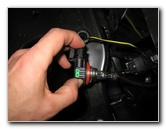
Push On Ability Connector
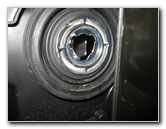
Low Axle Bulb Socket

1/four Turn Clockwise - Lock
Try to avoid touching the drinking glass office of the new halogen bulb with your fingers or anything dirty in the engine bay. If you practice touch the glass part of the new seedling, wipe information technology clean with an booze moistened paper towel.
Insert the new low beam seedling in to the headlight assembly and rotate it 1/iv turn clockwise to lock it in identify.
High Axle Bulb - Bottom
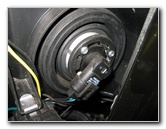
Base of High Beam Seedling
i/four Turn Counter Clockwise
High Beam Seedling Unlocked
Pull Out Former High Beam
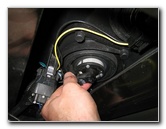
Printing Release Tab
Slide Off Power Connector
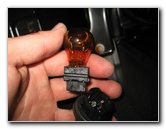
Philips HB3 LL 9005
High Axle Seedling Socket
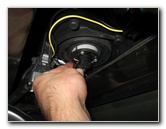
Insert New High Beam
1/4 Turn Clockwise - Lock
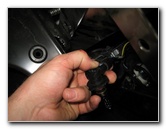
Rider Plow Signals
Attempt to avoid touching the glass part of the new loftier beam seedling with your fingers or annihilation muddy in the engine bay. If you do touch the glass office of the new bulb, wipe it make clean with an alcohol moistened paper towel.
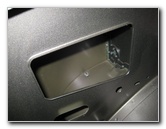
Like shooting fish in a barrel Access Cutout
Turn Signal Bulb Socket
1/four Plough Counter Clockwise
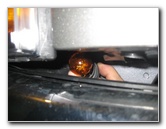
Rotate the turn signal bulb sockets one/4 plough counter clockwise and pull them direct out of the headlight assembly.
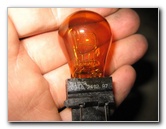
Pull the sometime bulbs straight out of the socket and push button in a new bister colored glass # 3157A, 3157NA or 4157NA bulb.
Re-insert the socket and rotate information technology 1/iv turn clockwise to secure it in place.
Pull Out Old 3157A
Commuter Side Turn Signals
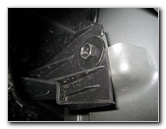
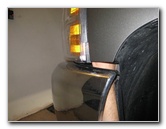
No Access Hole
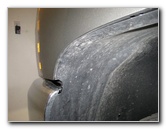
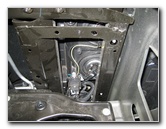
Bike Well Liner
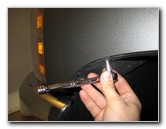
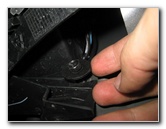
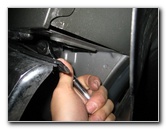
Remove 7mm Screw
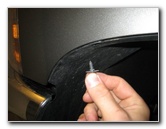
7mm Screw Removed
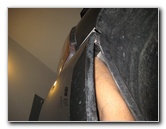
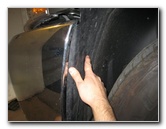
Ready the wheel well liner spiral bated in a safe identify. Pull back the wheel well liner.
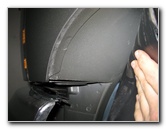
Pull Back Wheel Well Liner
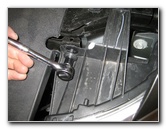
10mm Headlight Bolt
Remove Counter Clockwise
But to just replace the driver side turn signal bulbs, only requires removing 3 bolts to create a little bit of extra working room.
Remove the 10mm vertically mounted bolt on the top of the headlight assembly past turning it counter clockwise.
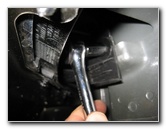
Horizontal 10mm Bolt
3rd 10mm Bolt At Bottom
Remove Lower Bolt
The third 10mm commodities at the bottom of the headlight tin be accessed through the bike well liner.
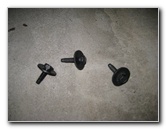
iii Headlight Bolts Removed
Pull Headlight Forward
Forward About 1/2-1"
Gently pull the headlight associates forward away from the truck about i/2" to 1".
Enough Room To Achieve In
i/iv Plough Counter Clockwise
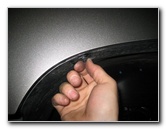
Turn Indicate Bulb Removed
Reach In To Upper Bulb
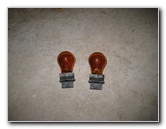
Two Plow Signal Bulbs
Install New 3157A Bulbs
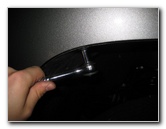
Pull the old bulb straight out of the socket and push in a new # 3157A, 3157NA or 4157NA bulb.
Re-insert the socket back in to the headlight associates and rotate it 1/4 plough clockwise to secure information technology in place.
Push button Headlight Back
Insert 10mm Bolt
Insert Horizontal Bolt
Re-insert the horizontally mounted 10mm headlight bolt.
Insert Lower 3rd Bolt
Tighten Lower Bolt
Replace Wheel Well Liner
Tighten the lower bolt with the 10mm socket and ratcheting wrench.
Insert 7mm Screw
Tighten With 7mm Socket
Tighten Bolts
Tighten the two upper headlight bolts with the 10mm socket and ratcheting wrench.
Passenger Side
Push In Lower Air Box Half
Insert Air Filter Chemical element
Replace Top One-half Box
Tighten Torx T25 Screws

Air Box Re-Installed
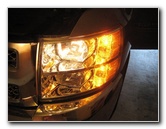
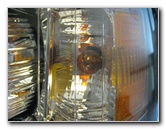
Test New Headlights

Testing Passenger Bulbs
For more, check out my other 2007-2013 Chevy Silverado Repair & Maintenance Guides.

Source: https://www.paulstravelpictures.com/GM-Chevrolet-Silverado-Headlight-Bulbs-Replacement-Guide/
Posted by: santiagoalayeaker1985.blogspot.com
0 Response to "How To Repair 2012 Chev Silverado, Low Beam Light That Is Out."
Post a Comment